

For those of you who've decided to beat the clubbing crowds and take upon the eerie task of throwing a Halloween Party yourselves, a Jack-O'-Lantern is a must-have piece in your party decor.
Why is it called the Jack-O'-Lantern, you ask? Well, there are several folklores explaining why it is so, but the most commonly known one is that of a thief named Jack who was rejected from both heaven and hell and was left to roam the earth with no light. The devil gave him an ember from hell that would never burn out and Jack decided to use it in a lantern he made out of a carved tulip to find a resting place on the streets, which soon garnered him the title "Jack-O'-Lantern."
The Jack-O'-Lantern has later evolved to be known as a container for "treats" to be left for evil spirits so they would leave the household alone. If no treats are given, these evil spirits will play a "trick" on the household by wreaking havoc.
Don't give these spirits any chance to create chaos and start on the pumpkin carving already! OpenRice.com shows you how you can make your own Jack-O'-Lantern in 4 easy steps.
Step 1: Choosing a Pumpkin

Pick up a pumpkin with a flatter bottom so that it sits on a flat surface. Choose a size based on the complexity of the design you have in mind. For a start, we suggest going with a round medium-sized pumpkin so you'll be able accommodate both freestyle drawing or a stencil. Also, check to see if the pumpkin is still fresh by tugging the stem and pressing the area around the stem. If it displays any hint of softness, it is no longer fresh.
Step 2: Drawing on the Pumpkin
Using a marker, draw a circle on the top around the stem. As a rule of thumb, the hexagon diameter should be 2/3rd of the pumpkin's.

Next draw a face on your pumpkin. For starters, you can draw two triangles for the eyes, a circle for the nose and a zig-zag mouth. You can do this freehand with a marker, or for you non-artists with unstable hands out there, you can use a stencil to draw out the face. Stencils can be found free online.

Basic Pumpkin Stencil from eHow.
Once you've found your perfect stencil, print it, cut out the black parts and use it as a guide to draw the eyes, nose and mouth on your pumpkin.
Step 3: Carving the Pumpkin
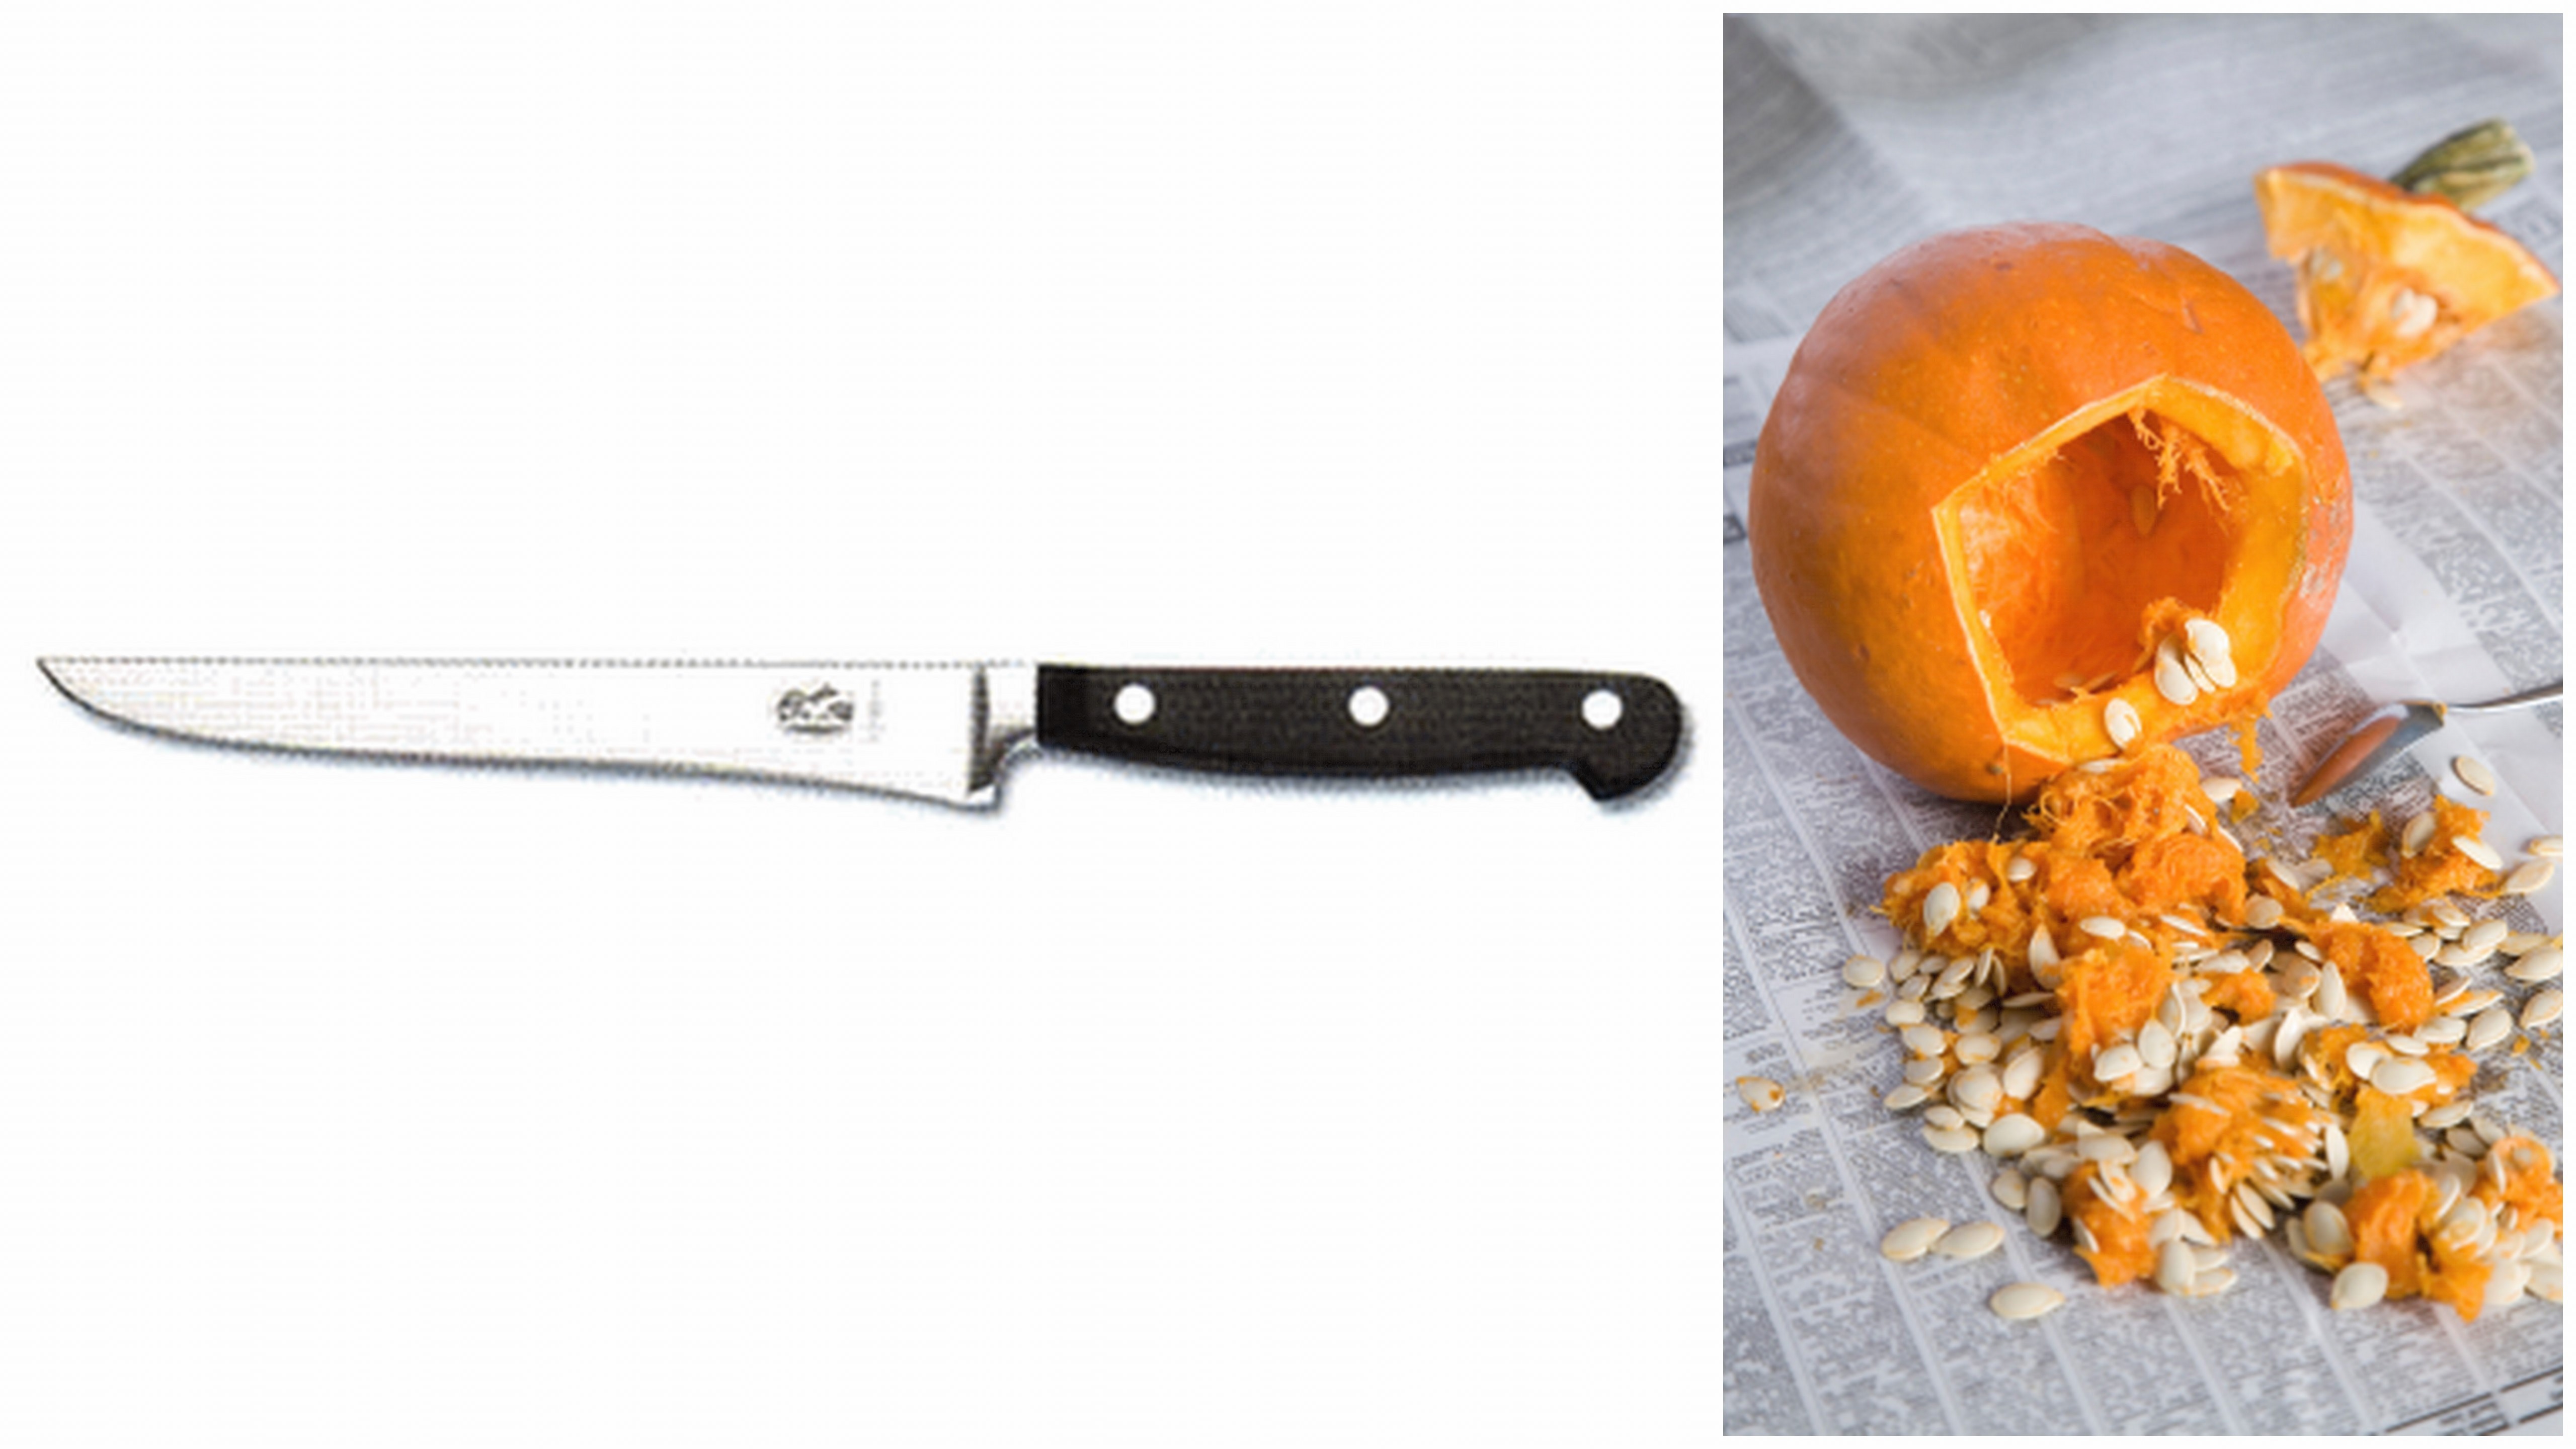
Using a thin bladed boning knife, follow the circle line and cut out the top of the pumpkin by slicing the knife back and forth. Do it in an cone angle such that the lid wouldn't stay put and wouldn't drop inside as you put it back on.
Using an ice cream scoop, scoop out the guts and scrap the walls of the pumpkin clean.
Proceed to carve out the smaller details such as the eyes, nose and mouth but this time use a paring knife.
Step 4: Lighting
Insert a plain white votive candle as it is safer, lasts longer and illumniate the brightest. Some people prefer to cut a hole from the bottom and place the pumpkin over the candle. There you have it! Your homemade pumpkin for Halloween spooktacular!

Remember, there's no hard and fast rules to pumpkin carving, just have fun while doing it! It is great for family bonding as well. The tutorial shown above is just some basic steps to getting started.
Now you'll have something to light up dark pathways at your party. It can also double up as a container (without the ember) to leave "treats" for your guests so they won't be up to any "tricks."
Hunt for the best Singaporean restaurant
Find out more hottest Malaysian restaurant
Why is it called the Jack-O'-Lantern, you ask? Well, there are several folklores explaining why it is so, but the most commonly known one is that of a thief named Jack who was rejected from both heaven and hell and was left to roam the earth with no light. The devil gave him an ember from hell that would never burn out and Jack decided to use it in a lantern he made out of a carved tulip to find a resting place on the streets, which soon garnered him the title "Jack-O'-Lantern."
The Jack-O'-Lantern has later evolved to be known as a container for "treats" to be left for evil spirits so they would leave the household alone. If no treats are given, these evil spirits will play a "trick" on the household by wreaking havoc.
Don't give these spirits any chance to create chaos and start on the pumpkin carving already! OpenRice.com shows you how you can make your own Jack-O'-Lantern in 4 easy steps.
Step 1: Choosing a Pumpkin
Pick up a pumpkin with a flatter bottom so that it sits on a flat surface. Choose a size based on the complexity of the design you have in mind. For a start, we suggest going with a round medium-sized pumpkin so you'll be able accommodate both freestyle drawing or a stencil. Also, check to see if the pumpkin is still fresh by tugging the stem and pressing the area around the stem. If it displays any hint of softness, it is no longer fresh.
Step 2: Drawing on the Pumpkin
Using a marker, draw a circle on the top around the stem. As a rule of thumb, the hexagon diameter should be 2/3rd of the pumpkin's.
Next draw a face on your pumpkin. For starters, you can draw two triangles for the eyes, a circle for the nose and a zig-zag mouth. You can do this freehand with a marker, or for you non-artists with unstable hands out there, you can use a stencil to draw out the face. Stencils can be found free online.
Basic Pumpkin Stencil from eHow.
Once you've found your perfect stencil, print it, cut out the black parts and use it as a guide to draw the eyes, nose and mouth on your pumpkin.
Step 3: Carving the Pumpkin
Using a thin bladed boning knife, follow the circle line and cut out the top of the pumpkin by slicing the knife back and forth. Do it in an cone angle such that the lid wouldn't stay put and wouldn't drop inside as you put it back on.
Using an ice cream scoop, scoop out the guts and scrap the walls of the pumpkin clean.
Proceed to carve out the smaller details such as the eyes, nose and mouth but this time use a paring knife.
Step 4: Lighting
Insert a plain white votive candle as it is safer, lasts longer and illumniate the brightest. Some people prefer to cut a hole from the bottom and place the pumpkin over the candle. There you have it! Your homemade pumpkin for Halloween spooktacular!
Remember, there's no hard and fast rules to pumpkin carving, just have fun while doing it! It is great for family bonding as well. The tutorial shown above is just some basic steps to getting started.
Now you'll have something to light up dark pathways at your party. It can also double up as a container (without the ember) to leave "treats" for your guests so they won't be up to any "tricks."